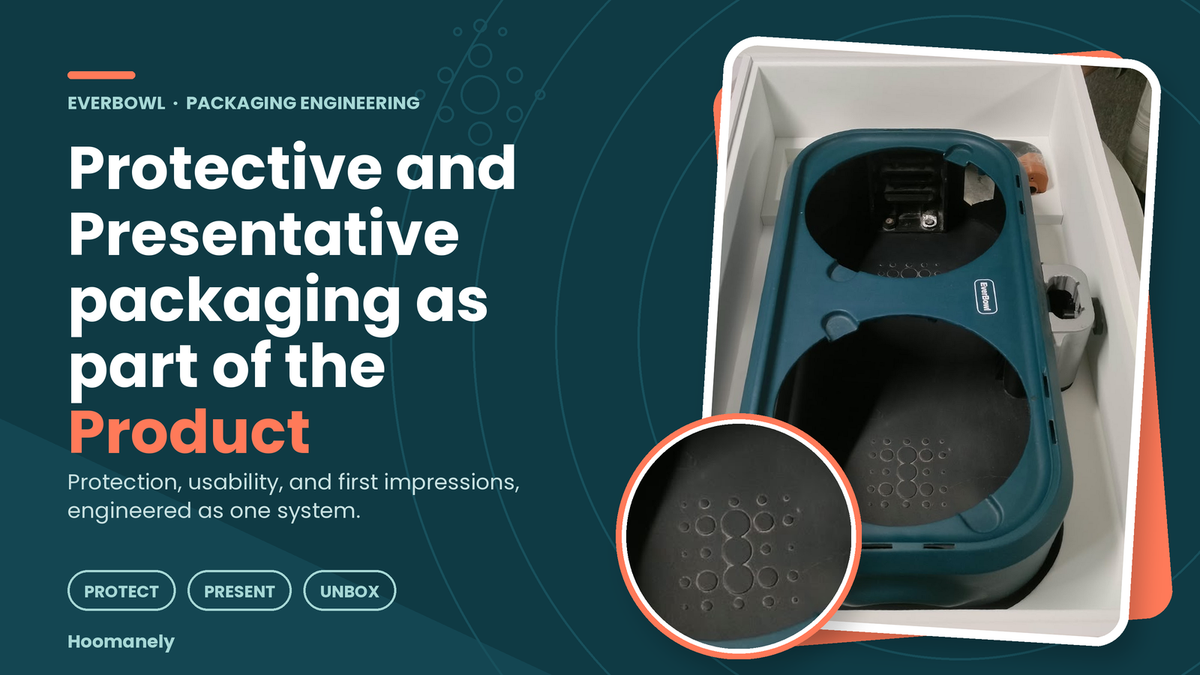
Protective and Presentative packaging as part of the Product
Packaging structure that builds first-impression trust.
The first interaction of a product with a customer doesn't begin when it's switched on. It begins when the package arrives, gets opened, and shows how the product was protected and presented. That moment sets two expectations: the product should have arrived safely, and taking it out should feel intuitive. Premium-looking packaging that lets the product move around in transit undermines trust before the device is ever used. Packaging that protects the product but demands excessive force, awkward gripping, or unnecessary dismantling makes the first interaction frustrating in a different way.
That makes unboxing a product-design challenge, not just a packaging or graphic-design exercise. The outer carton, cushioning, internal cavities, accessory compartments, and opening sequence have to work as one system, and each piece has two jobs: protect the product in transportation and guide the customer toward a safe, easy first interaction.
Design for the journey before the reveal
A package lives in two very different environments: the uncontrolled trip to the customer, and the controlled moment after delivery. In shipping it can be dropped, compressed, vibrated, and handled in any orientation. Once it arrives, it might get opened on a table, the floor, or some other cramped surface. The packaging has to work in both.
Three objectives should guide the design. Transit protection limits damaging shock, unwanted movement, and contact with hard surfaces. Safe removal lets the customer reach and lift the product without pulling on delicate components or fighting a tight insert. Clear presentation reveals the product, accessories, and first-use information in a logical order.
These objectives conflict in practice. A tight cavity restrains a product well in transport and makes it hard to remove. Extra cushioning improves impact protection while eating finger clearance. A smaller carton cuts shipping volume and can leave too little room to grip the product safely. The goal isn't to add more cushioning or shrink the package for its own sake. It's to find a structure that gives verified protection and still makes the product easy to reach.
Translate shipping risks into design requirements
Before choosing the internal layout, work out what the package has to withstand. Not every device tolerates the same impact, so fragility matters. It's usually expressed in g-forces, where a lower value means the product is more susceptible to shock damage. Approximate reference ranges for packaged products:
| Product fragility category | Typical fragility range |
|---|---|
| Extremely fragile | 15–25 g |
| Very delicate | 25–40 g |
| Delicate | 40–60 g |
| Moderately delicate | 60–85 g |
| Moderately rugged | 85–115 g |
| Rugged | 115 g and above |
These are starting points, not a substitute for testing the actual device. A product can handle impact differently depending on its orientation, internal components, joints, and enclosure geometry.
The next piece is the transportation environment. When real distribution data isn't available, reference drop heights give you an initial test plan. A package weighing 0–10 lb may be evaluated against a 42-inch drop, while a 50–100 lb package has a 24-inch reference height, which falls as packages get heavier because of how they're typically handled. Actual test conditions still need to be chosen for the product, the shipping route, and the applicable test requirements. The takeaway is that packaging should be built around the product's vulnerability and expected handling, not just its appearance or shipping dimensions.
Design the internal structure around the product
Internal packaging is the first layer of physical protection. It supports the product, controls movement, and keeps vulnerable features from taking concentrated loads. A good insert accounts for where the product can safely carry its weight, clearance around protrusions, buttons, connectors, and lenses, the chance of the product shifting into the carton, where accessories sit and whether they can wander into the main cavity, and the grip points needed to lift the product out without twisting or levering it.
The cavity's shape matters as much as the cushioning material. A foam insert that looks right can still compress unevenly, allow movement, or make extraction awkward. Cushioning performance also depends on thickness, the load on the material, and how severe the impact is. Dynamic cushioning curves show how a material behaves under specific impact conditions, including repeated ones, which matters because transportation is rarely a single-impact event. Judge a cushioning system on repeated-impact performance, not just how it handles the first hit.
Protection and material efficiency have to work together
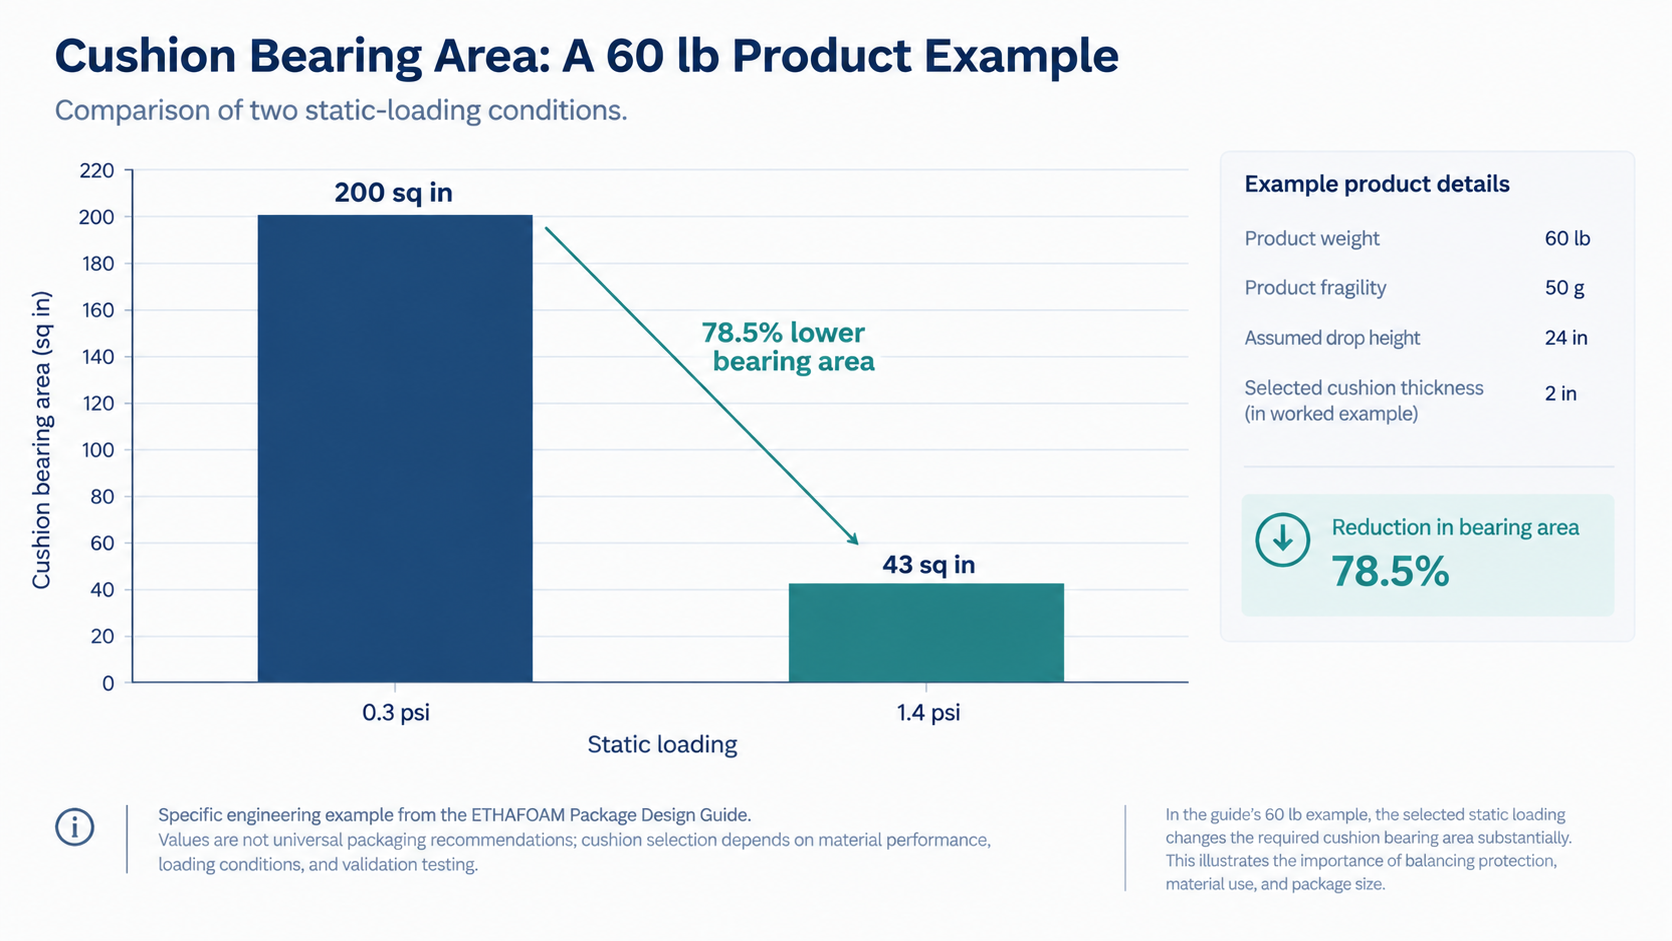
Take an engineering example: a 60 lb product with a fragility of 50 g and an assumed 24-inch drop. The thinnest suitable option among the cushioning curves evaluated is a 2-inch cushion, with an allowable static-loading range of 0.3–1.4 psi. At 0.3 psi, the required bearing area is 200 square inches. At 1.4 psi, it's about 43 square inches, a 78.5% reduction.
That shows why packaging should be based on measured cushioning behavior. Piling on material doesn't guarantee an optimal solution, and cutting material is only fine when protection stays adequate. These values describe one example, not a universal recommendation for consumer products, so the right material, thickness, and support area have to be established for the actual product and distribution conditions.
Make the opening sequence intuitive
Once the package has protected the product, the customer shouldn't have to solve a mechanical puzzle to get at it. The structure itself should say what to do next, with each layer having a clear purpose and each removal step setting up the next.
- Open the outer carton. The opening method should be obvious. Avoid designs that tempt someone to push a blade deep into the carton, where it can damage the product or accessories, and if a cutting tool is necessary, design for it.
- Reveal the product. The first view should show where the product sits and how it comes out. A presentation tray, pull tab, or accessible grip area can help, as long as it doesn't weaken retention in shipping.
- Remove the product safely. It should lift out without pulling on cables, connectors, moving parts, or delicate features. If it's heavy or awkward, give it enough clearance or a deliberate removal aid.
- Locate the accessories. Compartments should keep small components contained and out of the product cavity. Their location should be obvious, and taking them out shouldn't destabilize the main product.
- Prepare for first use. Quick-start instructions and essential setup parts should be easy to find, without dismantling layers of packaging to discover what's needed.
Evaluate this sequence with a physical prototype. CAD can check dimensions and fit, but it can't capture a customer's grip, removal force, interaction with flexible packaging, or confusion mid-opening.
Design against failures nobody sees coming
Packaging can look right at assembly and still fail after hours or days of transportation. A few failure modes deserve particular attention.
Cushion compression over time
Cushioning can slowly lose thickness under sustained load, a behavior called compressive creep. As it compresses, the product loosens and becomes more vulnerable to movement. A practical reference limit is 10% loss of cushion thickness, though what's acceptable depends on the material and application. What matters is verifying the product stays properly supported after sustained loading, not just right after assembly.
Cushion buckling
Buckling happens when a cushion compresses unevenly. Instead of spreading the impact as intended, the deformed cushion can send more shock to the product. Cushions that are too tall and thin are especially prone to it, so insert geometry needs checking alongside material selection.
Temperature and vibration
Extreme temperatures can change cushioning stiffness, and transportation vibration can pass through a cushioning system, get reduced, or get amplified depending on frequency and loading. For vibration-sensitive products, drop testing alone may not establish adequate protection, and the validation plan should reflect the product's vulnerabilities and the actual transportation environment.
Damage during removal
A package can survive transit and still put the product at risk when opened. A tight cavity, an unreachable grip point, a snagging accessory, or a badly placed pull tab can push the customer to apply force in the wrong direction. Removal is a safety consideration in its own right: the package has to hold the product securely in shipping and release it predictably at the point of use.
Measure both protection and the unboxing experience
Packaging development shouldn't rest on impressions like "it feels secure" or "it looks premium." Those observations help, but they need repeatable tests behind them. A practical validation plan has two parts.
Transit and safety testing
- Record the product's condition before testing.
- Run controlled drop tests at defined heights and orientations.
- Evaluate vibration where the product or distribution environment calls for it.
- Inspect for cracks, deformation, cosmetic damage, loose components, and functional failures.
- Check whether cushioning has compressed, buckled, or allowed excessive movement.
- Repeat relevant tests after changes to the product, carton, insert, or cushioning material.
Unboxing usability testing
- Observe whether participants understand how to open the package.
- Measure product-removal time and accessory-retrieval time.
- Record whether tools, help, excessive force, or repeated attempts are needed.
- Note accidental contact with sensitive features, dropped accessories, and confusing steps.
- Inspect the product after removal for damage caused during unboxing.
A development team can track these metrics across packaging revisions:
| Metric | What it measures |
|---|---|
| Damaged shipments (%) | Product damage relative to packages tested or shipped |
| Product removal time (seconds) | Time from opening the package to safely removing the product |
| Accessory retrieval time (seconds) | Time to locate and retrieve required accessories |
| Unassisted removal (%) | Participants who remove the product without help |
| Unsafe handling events | Observed actions that risk product damage or injury |
| Cushion thickness loss (%) | Change in cushion thickness after sustained loading |
Acceptance criteria should be defined for the specific product and test protocol, since no universal removal time or acceptable damage rate fits every package. The point of measuring is to compare revisions under consistent conditions and see whether a change genuinely improves safety, protection, or usability.
Refine the design without sacrificing protection
Optimization should be driven by observed failure modes. If a product arrives damaged, find where the damage happened and why before adding cushioning everywhere. If removal is difficult, look at grip access, cavity geometry, or the opening sequence without weakening the features that hold the product in transit. A disciplined cycle runs in five steps:
- Build a prototype with representative product geometry and packaging materials.
- Test the relevant drop, vibration, compression, and unboxing conditions.
- Inspect and record product damage, movement, cushion deformation, and removal difficulties.
- Revise the specific feature the evidence points to.
- Retest to confirm the change helps without introducing another failure.
A smaller carton or less cushioning might improve material efficiency, but accept it only after protective performance is verified. And a good-looking insert isn't a success if customers struggle to remove the product safely. The most effective package isn't the one with the most material or the fewest layers. It's the one that delivers the required protection with the least unnecessary complexity.
How this shows up at Hoomanely
At Hoomanely, our physical devices bring technology into everyday life with pets, so packaging is part of the product experience. The first interaction should reinforce what people expect from the device itself: care, reliability, and thoughtful design.
Conclusion
Unboxing is often treated as the final stage of product presentation, but it begins much earlier, with decisions about fragility, cushioning, geometry, retention, opening access, and validation. A successful package protects the product through uncertain handling and makes it intuitive for the customer to access. Neither should be traded away for a more dramatic reveal or a smaller carton. When it works, the product arrives protected, the customer knows what to do, and every step feels deliberate.
Key takeaways
- Design the package and product as one system.
- Establish fragility and shipping conditions before selecting cushioning.
- Account for repeated impacts, creep, buckling, temperature, and vibration where relevant.
- Make product removal intuitive without compromising transit protection.
- Measure both shipping damage and unboxing usability.
- Optimize material use and package size only after validating safety.
Source basis: ETHAFOAM Brand Package Design Guide (fragility ranges, reference drop heights, cushioning example). The numerical examples come from the guide and should be read in their stated context.