Feature Flags

A Complete Guide to Progressive Delivery, Controlled Rollouts & Experimentation
Modern mobile apps need two things: speed and safety. You want to ship fast, iterate fast, and test fast — but every release to the App Store or Play Store is a bottleneck. Once your users download an app version, you can't modify the behavior without shipping another build.
This is exactly where Feature Flags (a.k.a. Feature Toggles, Kill-Switches, Remote Configs) become invaluable.
Feature flags allow you to:
1. Ship code in production while keeping features off
2. Define who gets what feature
3. Run experiments
4. Roll back instantly without release
5 Protect yourself from catastrophic bugs
In this article, we go deep into how to build a production-grade feature flag system in Flutter — including architecture, caching, rollout strategy, percentage-based distribution, domain-based filtering, backend design, analytics correlation, versioning strategy, and pitfalls.
What Are Feature Flags?
A feature flag is a conditional switch that controls whether a feature in your app should be ON or OFF — without requiring a new app release.
Example:
if (flags.isEnabled("new_home_screen")) {
  return NewHomeScreen();
}
return LegacyHomeScreen();
Under the hood, this flag is fetched from your backend (API, PostHog, Firebase Remote Config, DynamoDB, etc.) and stored locally.
Why Feature Flags Matter
1. Zero-downtime feature rollouts
Turn features ON/OFF instantly.
2. A/B testing & experimentation
Roll out multiple versions of a feature and measure impact.
3. Safe deployments
Ship incomplete features to production, but keep them hidden.
4. Emergency kill switches
If a feature crashes or API breaks → turn the feature OFF instantly.
5. Customization by user attributes
- Email domain
- Country
- User type
- Pet type (in your case: Dog breed / Cat type)
- Subscription state (premium vs free)
6. Progressive release
Roll out to 1%, 5%, 10%, 20% of users as confidence increases.
3. Types of Feature Flags (Clearly Differentiated)
3.1. Boolean Flags (ON/OFF)
- Simple true/false values.
- Example:
show_new_home_screen = true
3.2. Configuration Flags
- Numeric or textual values.
- Example:
max_quiz_limit = 5
3.3. Percentage Rollout Flags
- Used for staged deployment.
- Example:
rollout: 20%
3.4. User-targeted Flags
- Based on user properties.
- Example: email domain, country code, premium user type.
3.5. Environment Flags
- Internal QA, staging, beta testers.
3.6. Kill Switch Flags (Emergency)
- Instantly disable a feature if the backend API goes down.
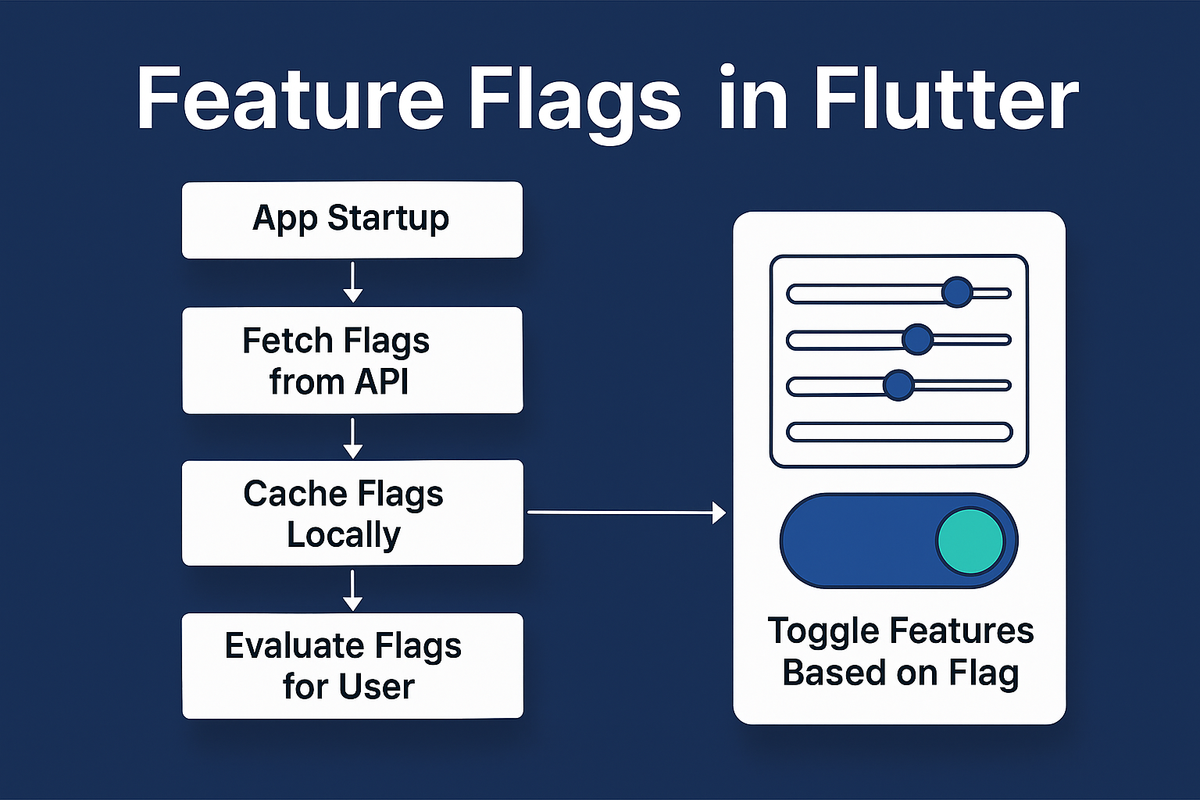
4. Architecture Overview (Point-wise)
- Backend layer
- Stores flag values.
- Provides API endpoints.
- Evaluates user-level conditions.
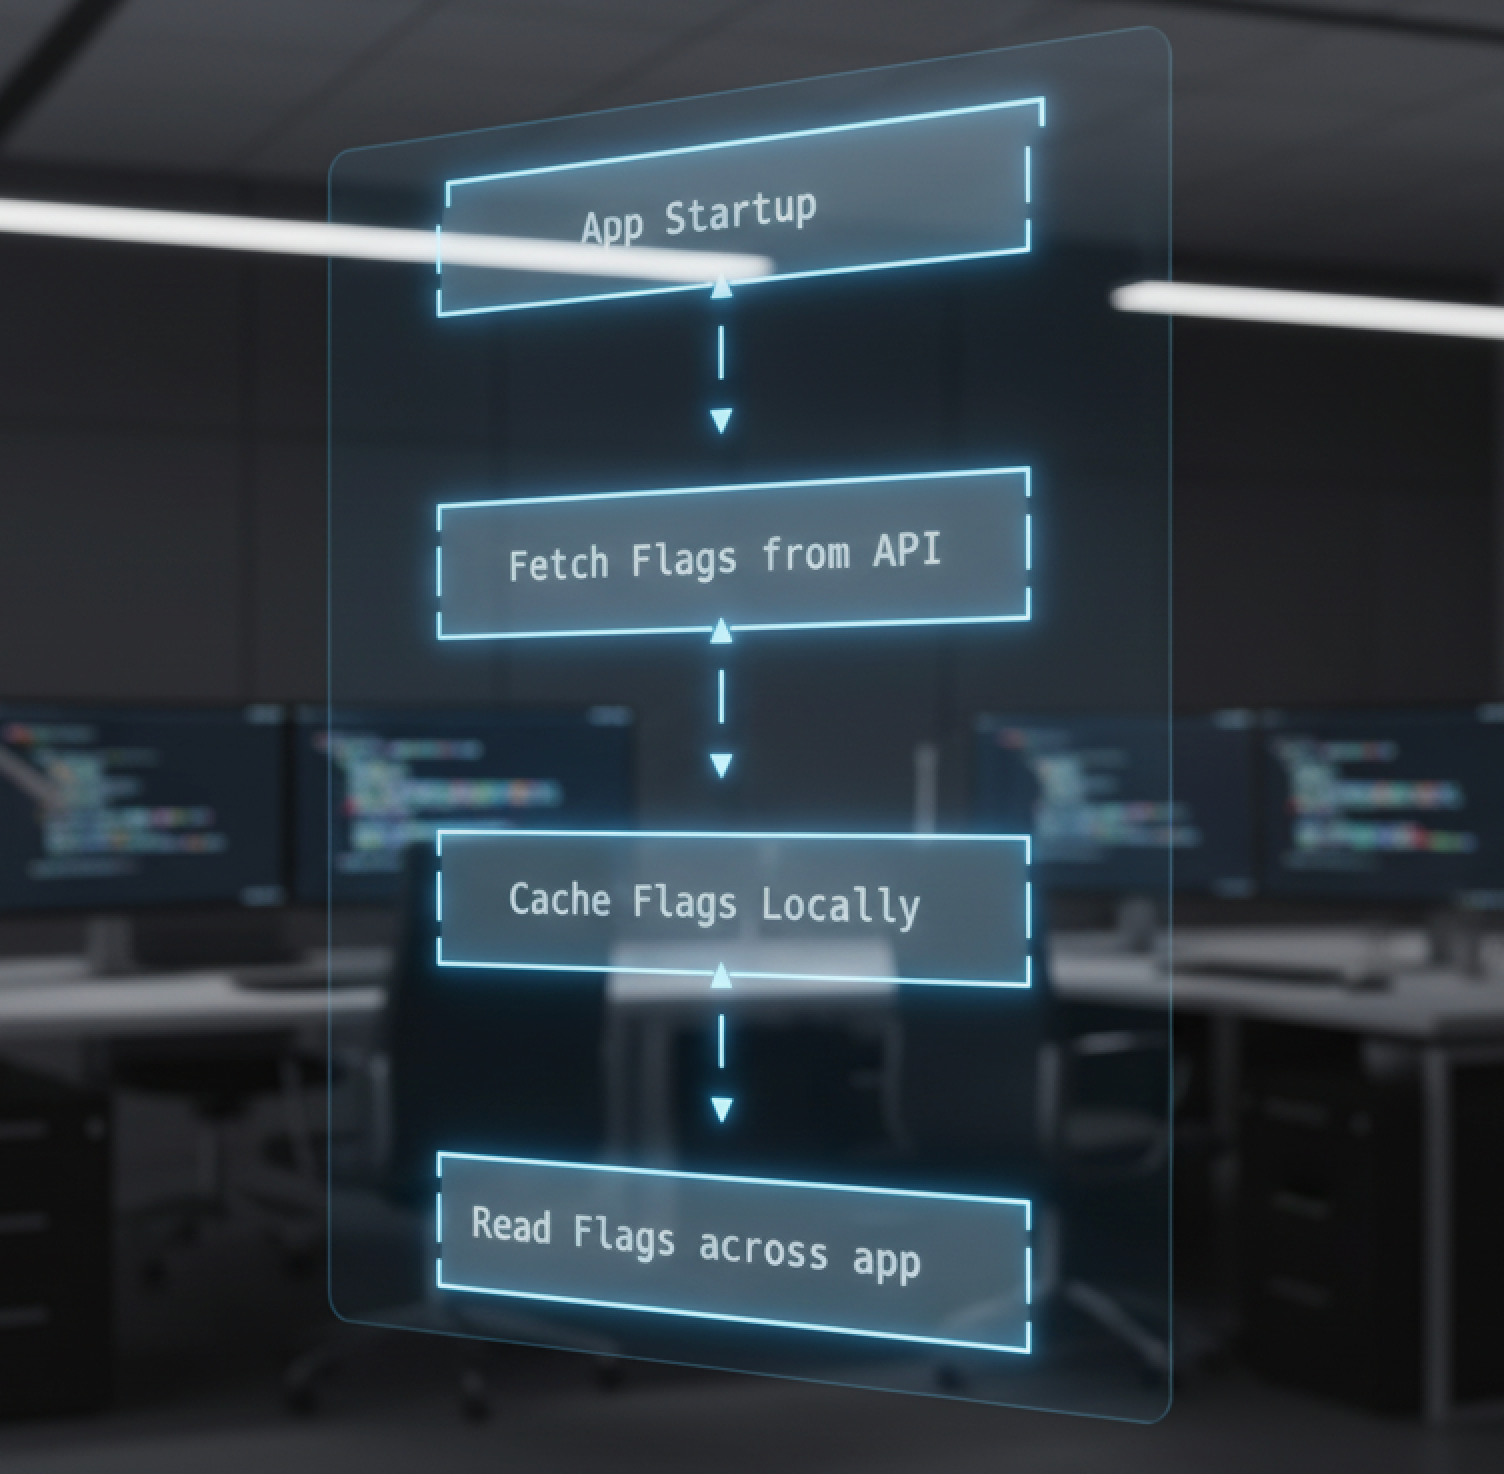
- Client-side Flutter layer
- Fetches and caches flags.
- Reads flags during UI rendering.
- Applies fallbacks if offline.
- Analytics layer
- Captures usage of enabled flags.
- Measures user behavior for experiments.
- Caching layer
- Stores last known flag values (SharedPreferences, Isar).
- Rollout evaluation engine
- Calculates eligibility (percentage/domain/user_id hash/etc.)
Feature Flags Life Cycle
Building Feature Flags in Flutter — Step-by-Step
Below is a clean, production-ready setup that works with any API (PostHog API, Firebase Remote Config, your custom DynamoDB API, etc.)
Step 1: Create a Feature Flag Service
class FeatureFlagService {
  Map<String, dynamic> _flags = {};

  Future<void> loadFlags() async {
    final response = await http.get(Uri.parse('https://your-api/feature-flags'));
    if (response.statusCode == 200) {
      _flags = jsonDecode(response.body);
    }
  }

  bool isEnabled(String key) {
    return _flags[key] == true;
  }

  dynamic getValue(String key) {
    return _flags[key];
  }
}
Step 2: Store Flags in a ViewModel / Provider
class AppFlagsViewModel extends ChangeNotifier {
  final FeatureFlagService service;
  bool isLoaded = false;

  AppFlagsViewModel(this.service);

  Future<void> init() async {
    await service.loadFlags();
    isLoaded = true;
    notifyListeners();
  }
}
Step 3: Use Flags in UI
Consumer<AppFlagsViewModel>(
  builder: (context, model, child) {
    if (!model.isLoaded) {
      return CircularProgressIndicator();
    }

    if (model.service.isEnabled('show_new_onboarding')) {
      return NewOnboarding();
    }
    return OldOnboarding();
  },
);
Step 4: Fallbacks / Offline Mode
Flutter apps should always include local fallback:
bool isEnabled(String key) {
  return _flags[key] ?? false;
}
API Design for Feature Flags (Simple, Scalable)
Here’s a minimal backend response:
{
  "show_new_onboarding": true,
  "enable_context_enrichment": false,
  "max_daily_quiz": 3
}
At Hoomanely. We built our own Feature Flag Dashboard + Rollout Engine, designed specifically for our ecosystem and Flutter architecture. This post breaks down why we did it, how it works, and what we learned along the way.
The Ultimate Benefit: Independence + Control
Tools like PostHog, Firebase, and Mixpanel give analytics + experimentation,
But control should reside within
Hoomanely’s custom implementation gives:
- full privacy
- complete logic ownership
- integration with App
Feature flags give us a safe way to ship fast while keeping full control over what reaches our users. By building our own system, Hoomanely can decide exactly who gets which feature. This makes rollouts predictable and reduces risk, because we can turn any feature ON, OFF, or scale it gradually without waiting for app store approvals. It also lets us react quickly if something breaks, thanks to built-in kill switches and smart fallback rules.
This helps us test safely, personalize experiences, and protect the app from unstable features or backend issues. As we continue to expand our AI workflows, insights engine, and device integrations, this system ensures that every release is stable and controlled.